
Lightning Wallet Setup Muun
Sequence Wiki — Paying Your Invoice
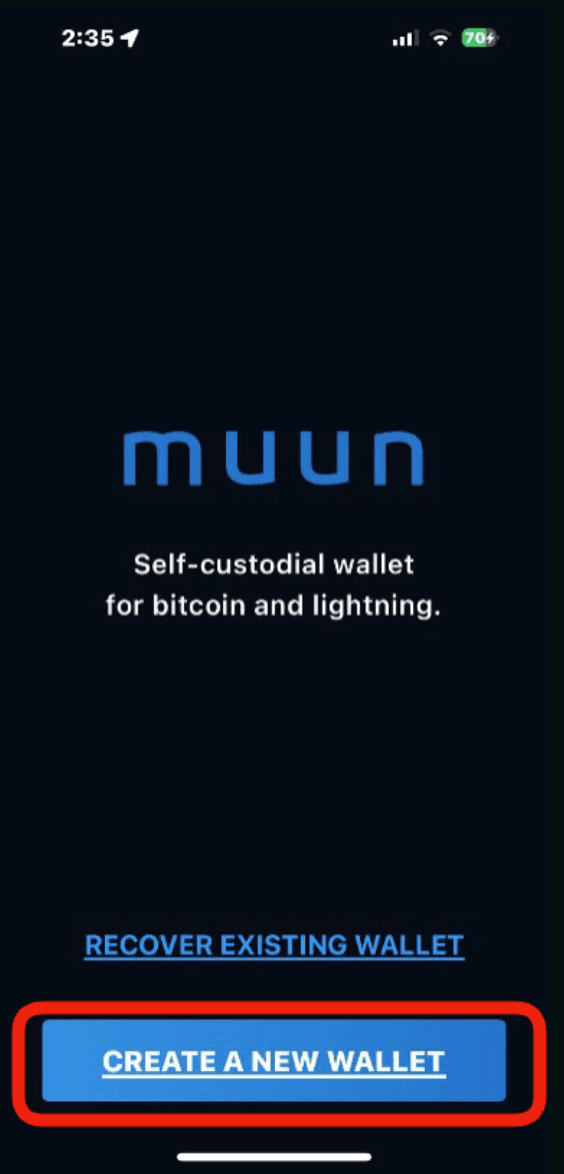
Table of contents
What is The Muun Wallet?
Muun is a non-custodial Bitcoin and Lightning wallet that gives you full control of your funds. It’s simple, secure, and works seamlessly for both BTC on-chain and BTC Lightning transactions (a lightweight protocol that is secured by the Bitcoin network).
⬇ Step 1: Install the App
- Download Muun Wallet from:
- Open the app once it’s installed.
💰 Step 2: Create Your Wallet
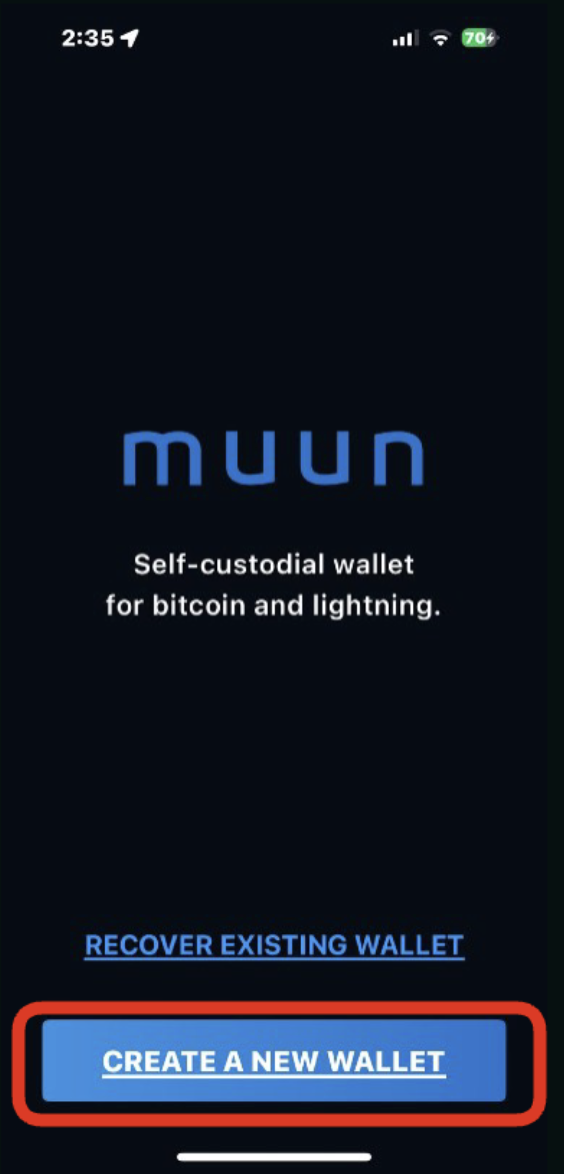
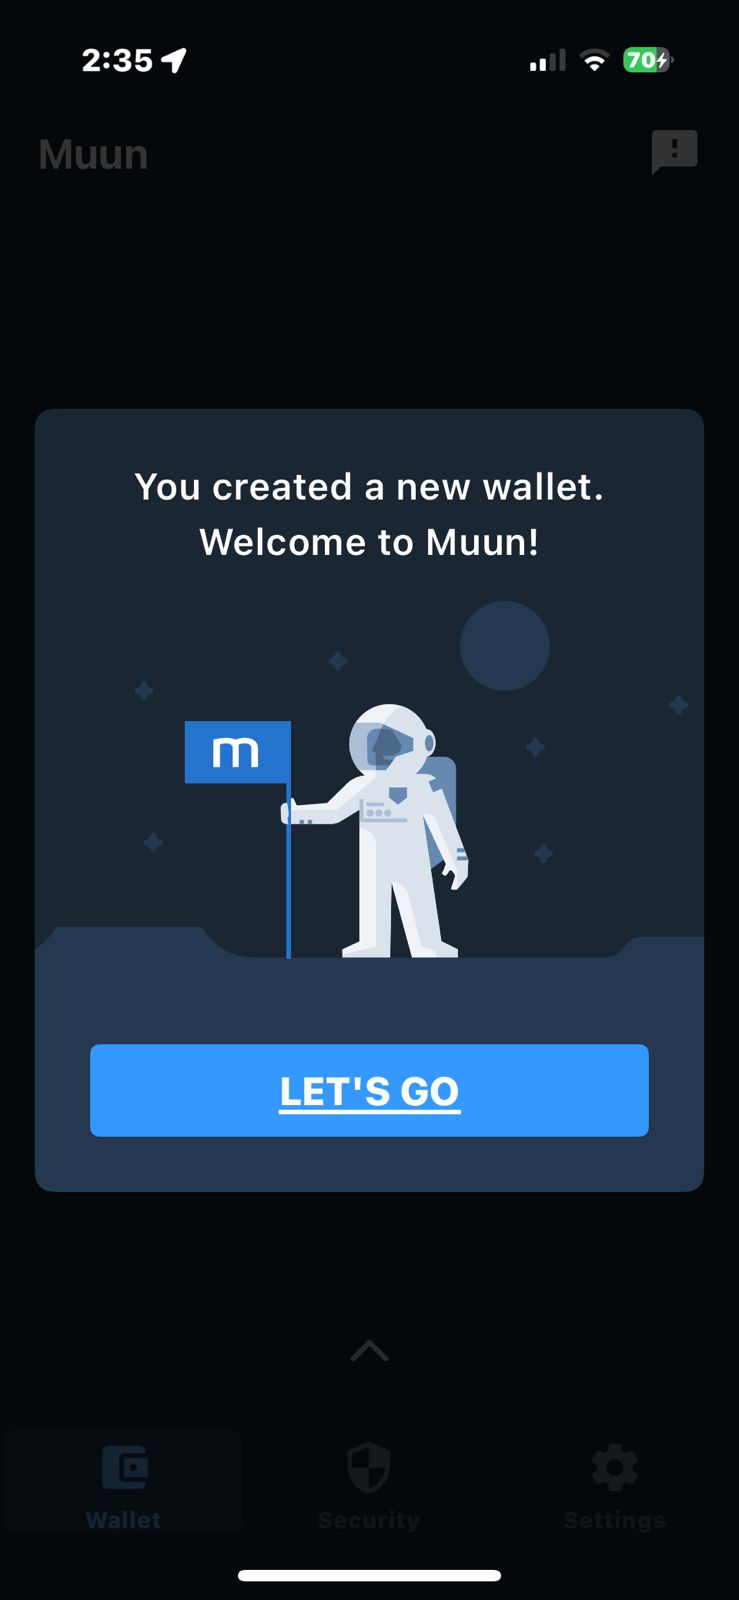
- Tap “Create a new wallet”.
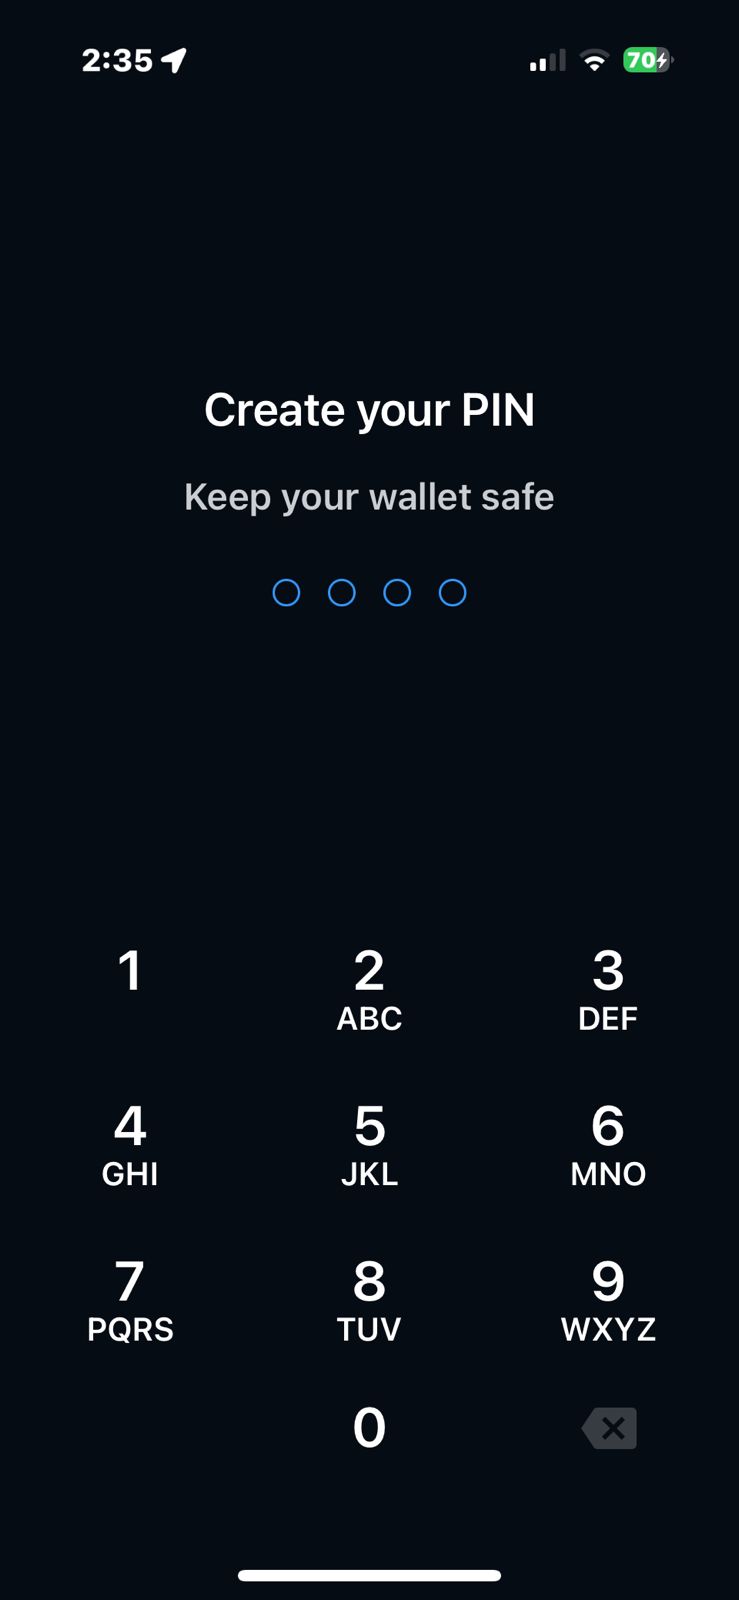
- Create a PIN code (this will be required every time you open the app).
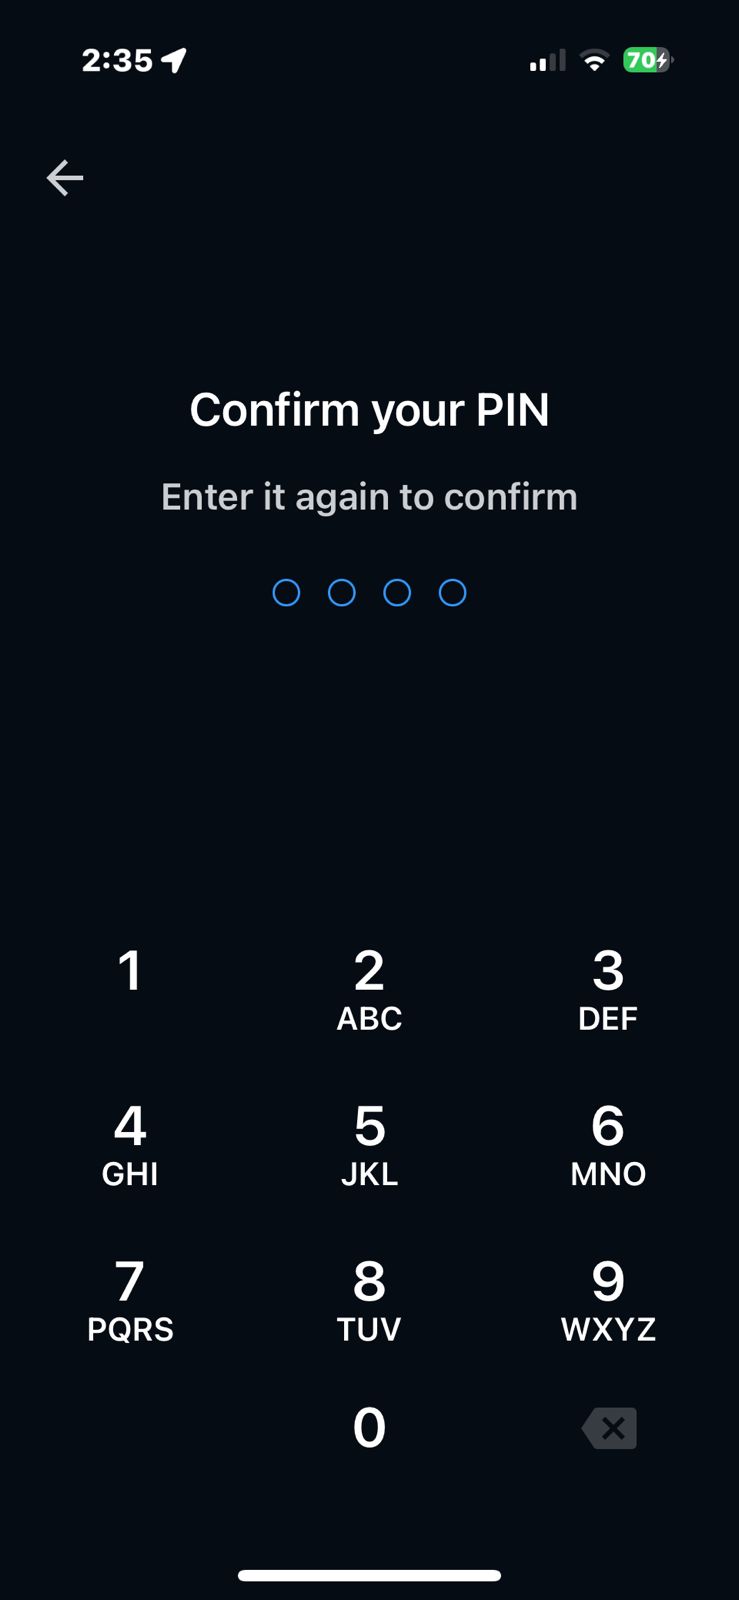
- Your new wallet is ready! Muun will automatically enable a secure device authentication, linked to your phone’s built-in security system:
- On iPhone, this Passkey is stored in your iCloud Keychain and linked to Face ID or Touch ID.
- On Android, it’s linked to your Google account and your device’s biometric unlock.
🔐 Step 3: Securing your account (optional)
How to Back Up Your Muun Wallet
Backing up your wallet is essential to recover your funds in case you lose access to your phone. Follow these steps carefully:
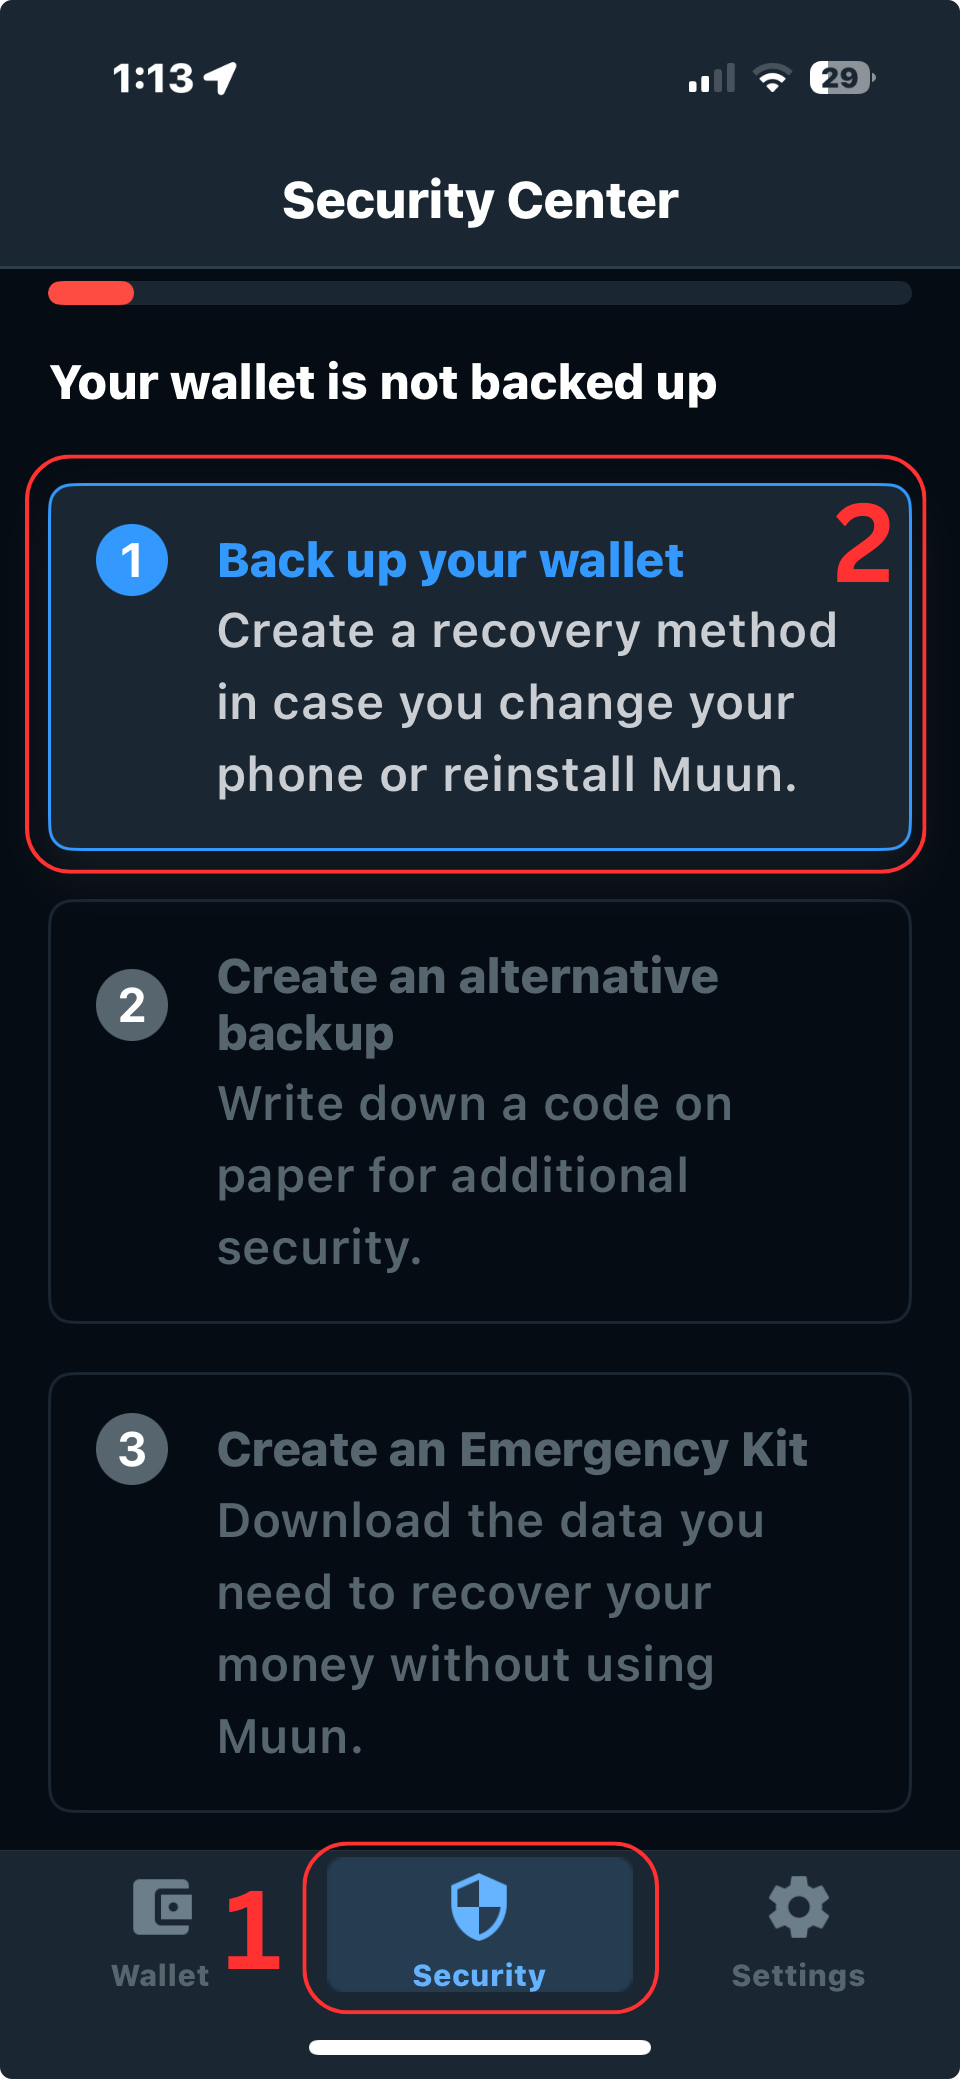
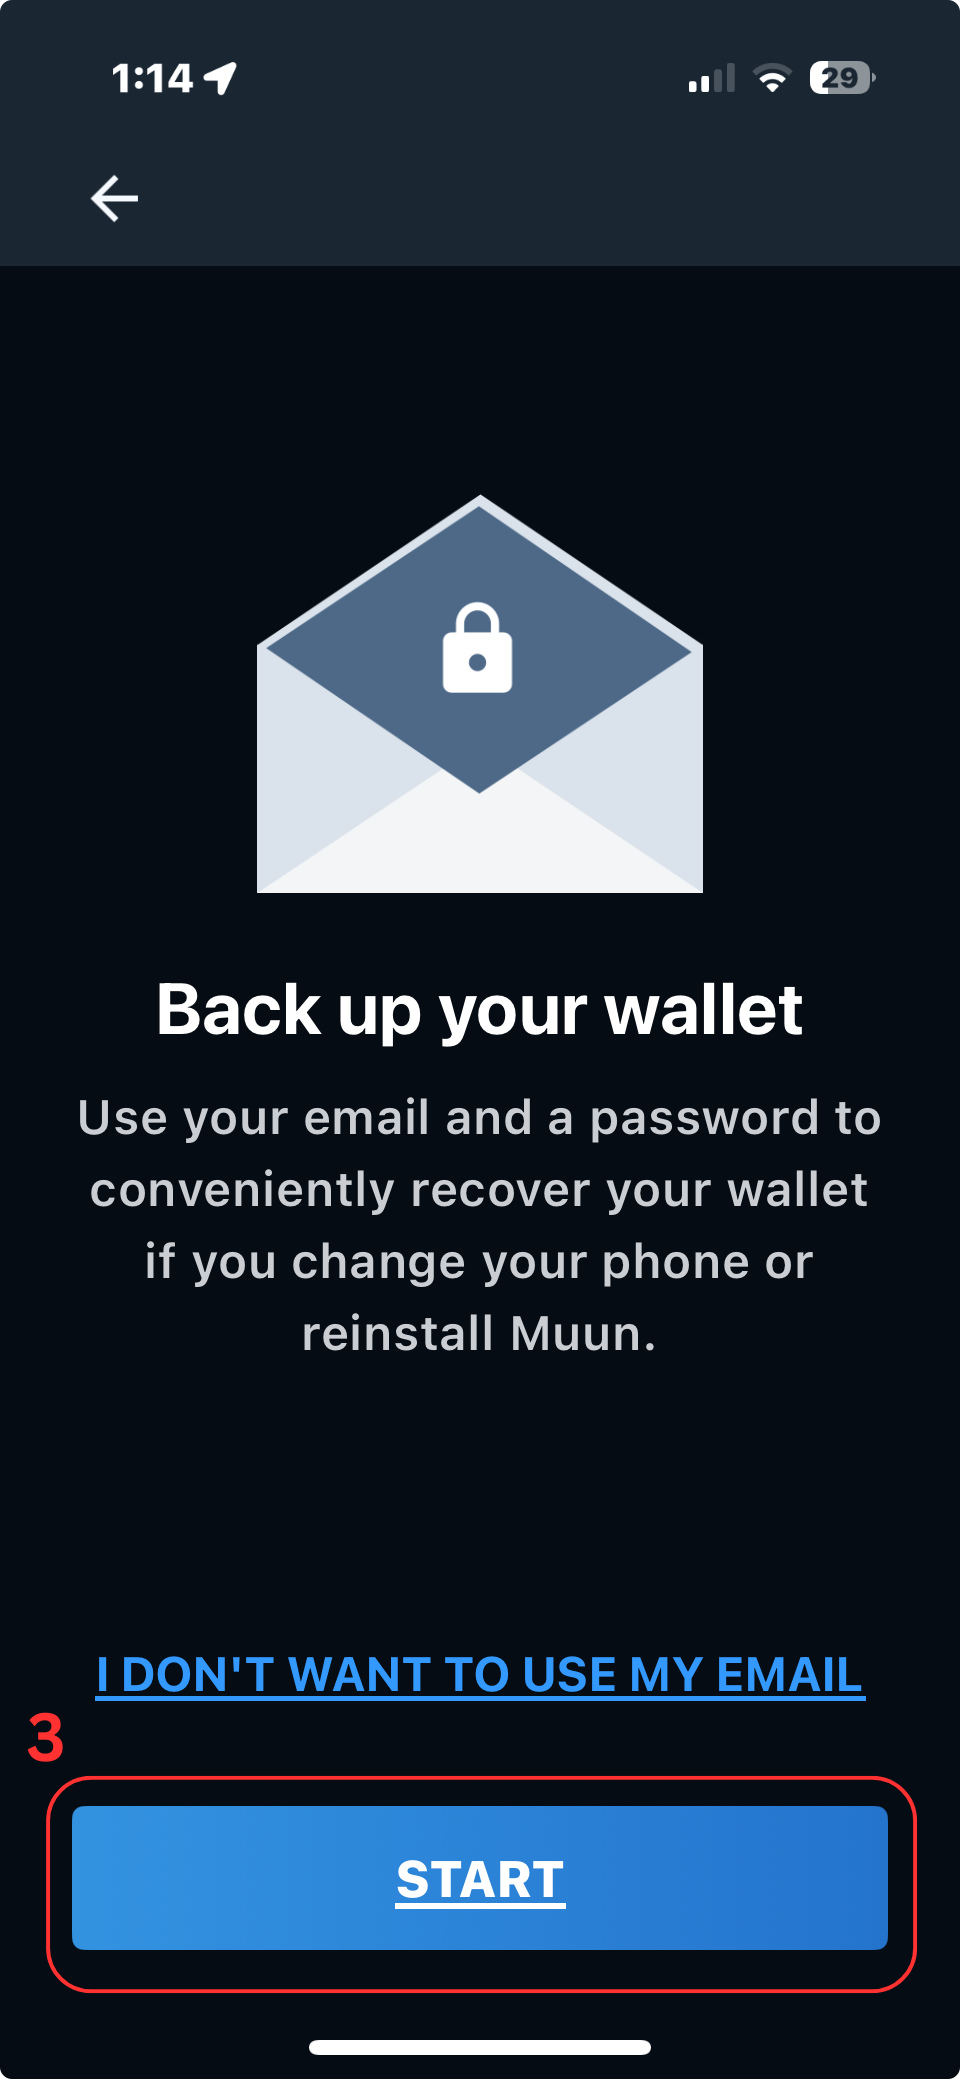
- Go to “Security” and tap “Back up your wallet” and then “Start”.
1. Enter a Recovery Email
- Type your email address in the field provided.
This email will be used to recover your wallet if you lose your device.
- Tap Confirm Email to continue.
2. Verify Your Recovery Email
- You will receive a verification email from Muun.
- Open your inbox and click Verify your email to confirm ownership.
- Once verified, return to the Muun app to continue.
3. Create Your Password
- Set a password for your backup.
Choose something memorable and at least 8 characters long.
- Avoid reusing old passwords.
- Tap Create Password to continue.
4. Confirm Your Password
- Re-enter the same password to confirm.
- Tap Confirm Password once both fields match.
5. Review and Confirm
Before finishing, Muun will ask you to confirm two important points:
- ✅ You understand you’ll need both your email and password to recover your wallet.
- ✅ You understand that Muun cannot reset your password if you forget it.
Tap Finish to complete the process.
6. Success!
You’ll see a confirmation screen: “Success! You backed up your wallet and can now recover it using your email password.” Tap Excellent to return to your wallet.
- Type your email address in the field provided.
How to Create Alternative Backup
This step adds an extra layer of security, allowing you to recover your wallet even if you forget your password.
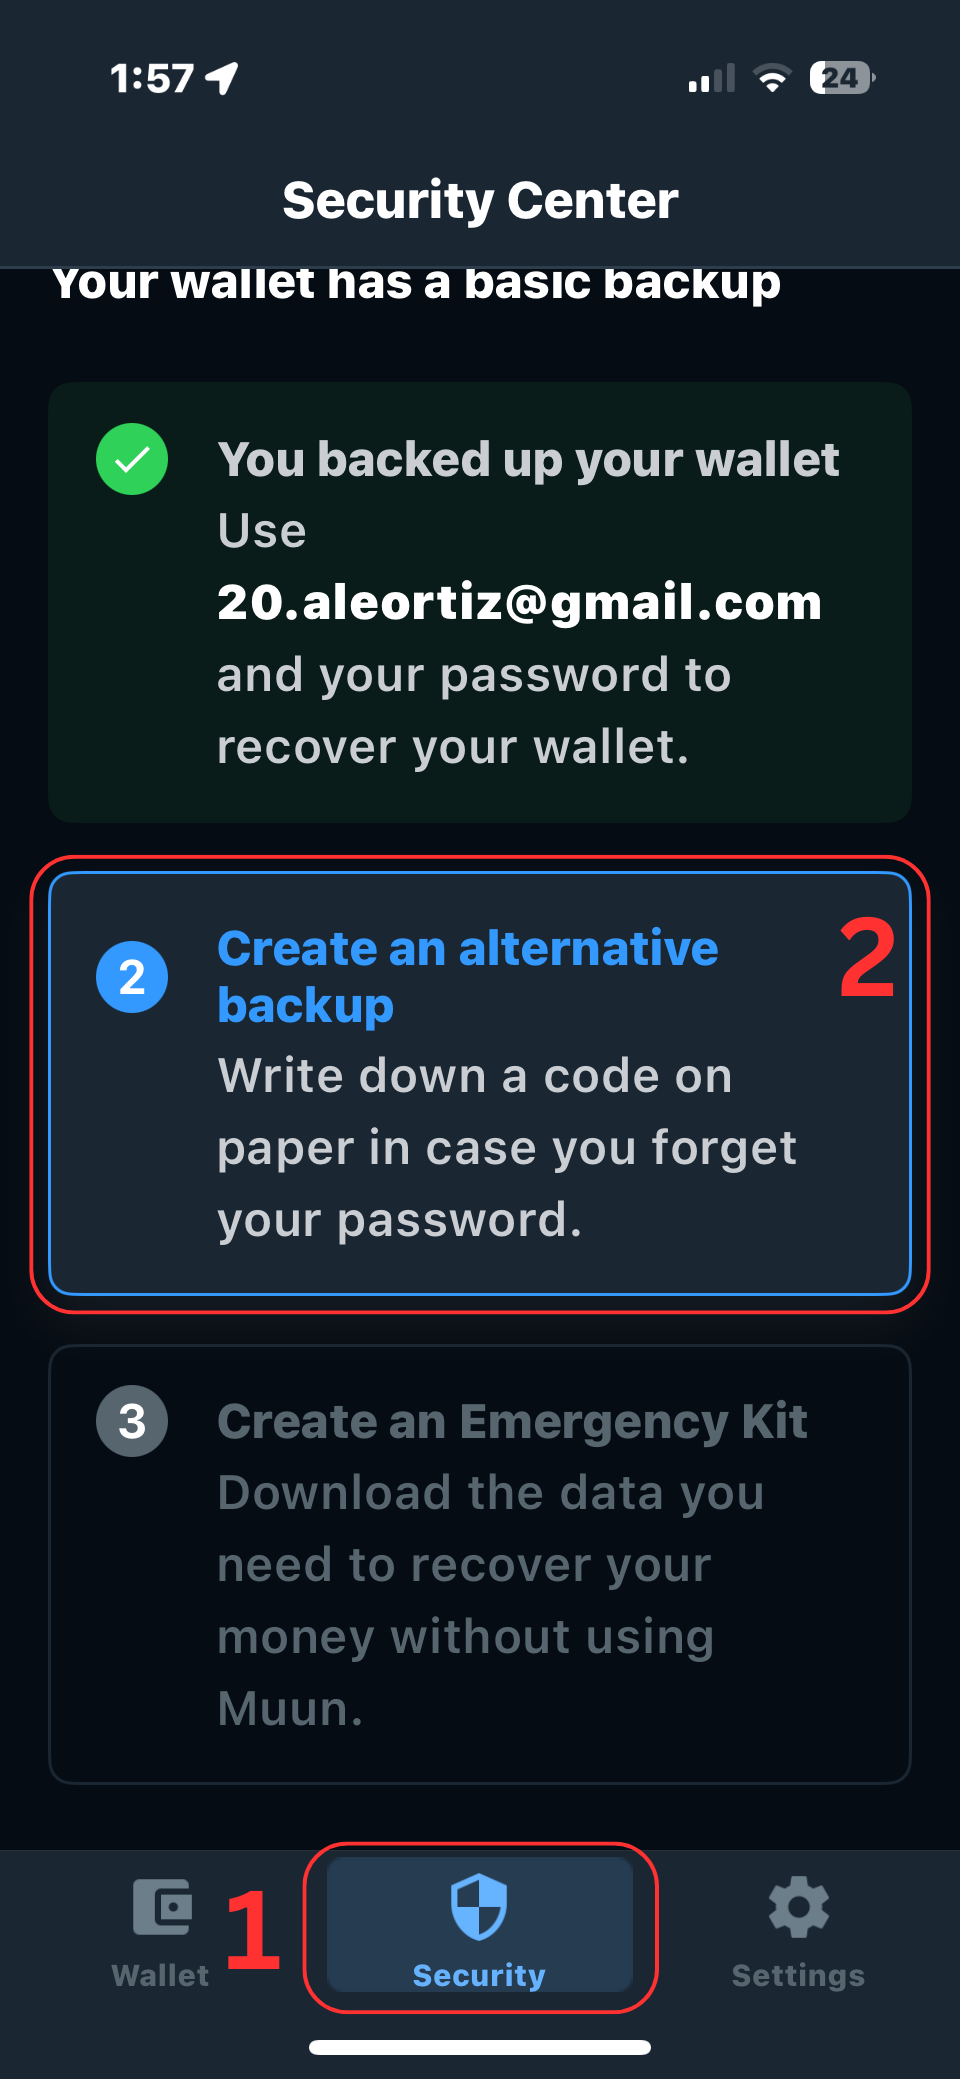
- Go to “Security” and tap “Create an alternative backup” and then “Start”.
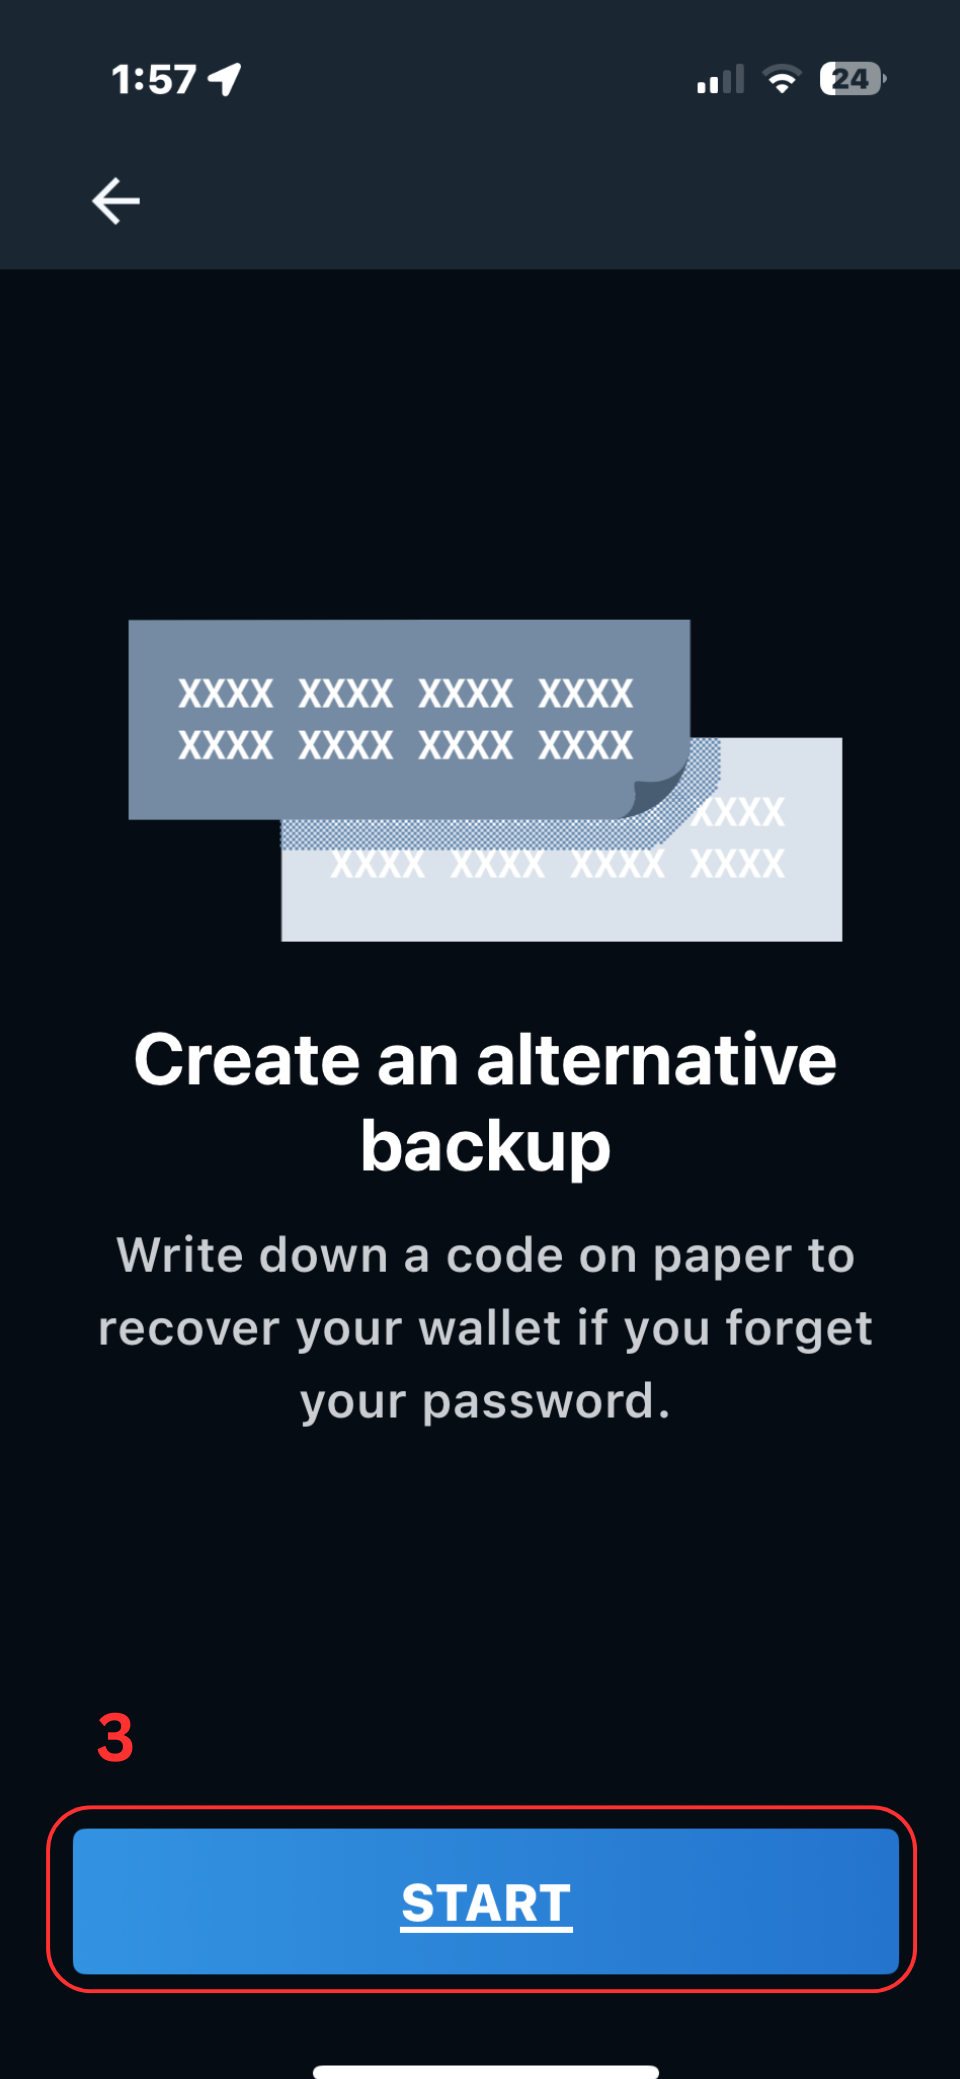
1. Write Down Your Recovery Code
- Muun will display a unique Recovery Code made up of letters and numbers.
- Write it down on paper — do not take screenshots, copy-paste, or store it on your phone or in the cloud.
- Tap Continue once you’ve written it down.
2. Confirm Your Recovery Code
- Re-enter the code exactly as it appears on the screen to confirm you’ve saved it correctly.
- Tap Confirm Recovery Code to continue.
3. Review and Acknowledge
Before completing the process, Muun will ask you to confirm two key points:
- ✅ You understand that you’ll need your Recovery Code to restore your wallet.
- ✅ You understand that Muun does not keep a copy of your Recovery Code, and it cannot be changed.
Tap Finish to complete the setup.
4. Success!
You’ll see a confirmation message: “Success! You can now recover your wallet using your email Recovery Code.” Tap Excellent to return to your wallet.
₿ Step 4: Receive Bitcoin from your Bybit account
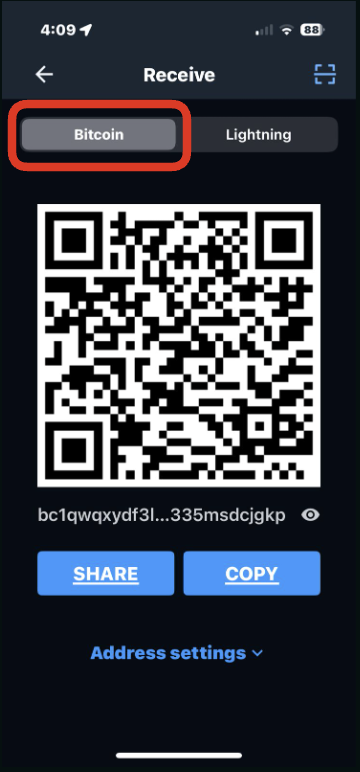
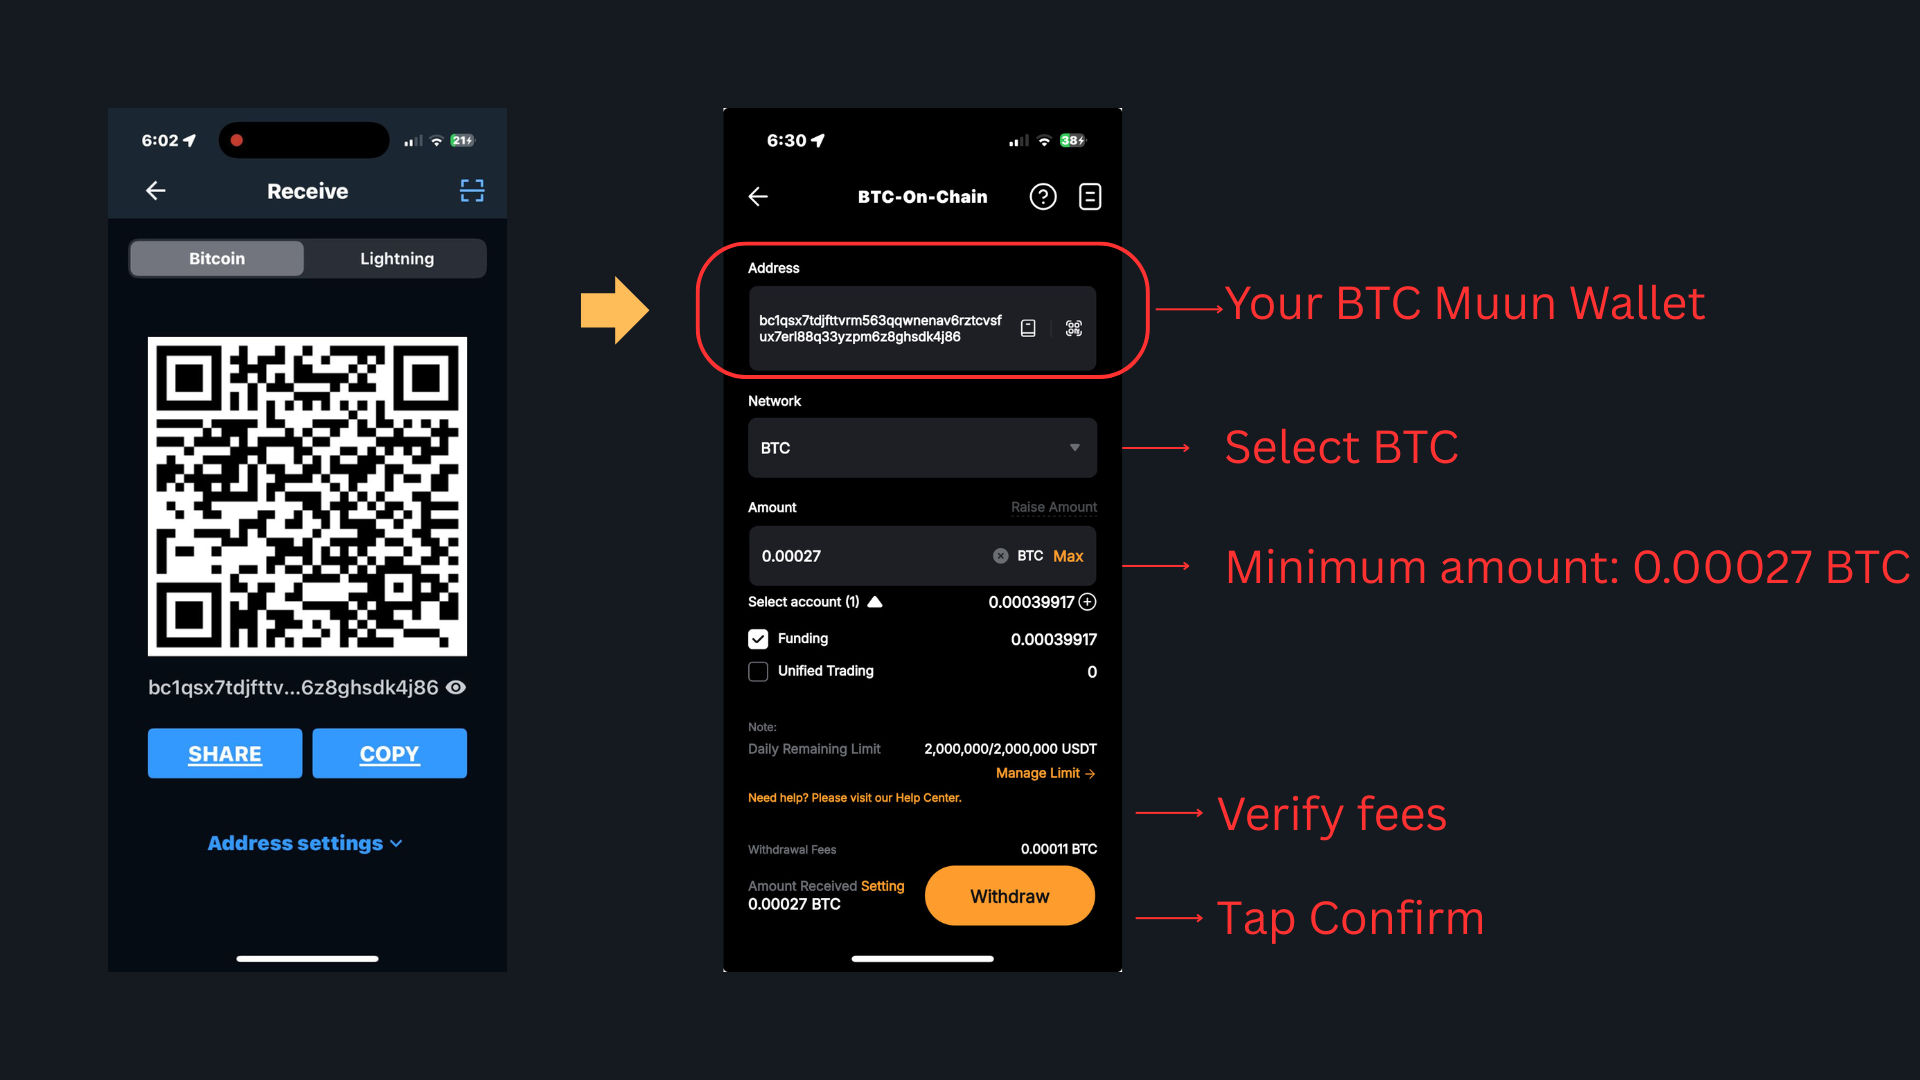
- In Muun, find your wallet’s Bitcoin On-Chain Address:
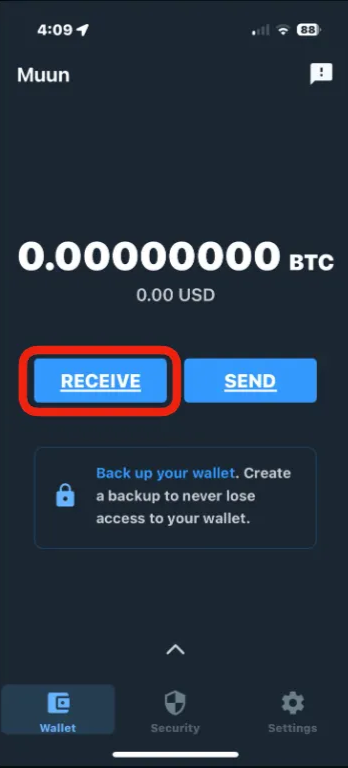
- Open the wallet, tap "Receive," choose Bitcoin, and copy your on-chain BTC address.
- Make sure you're using Bitcoin On-Chain Address
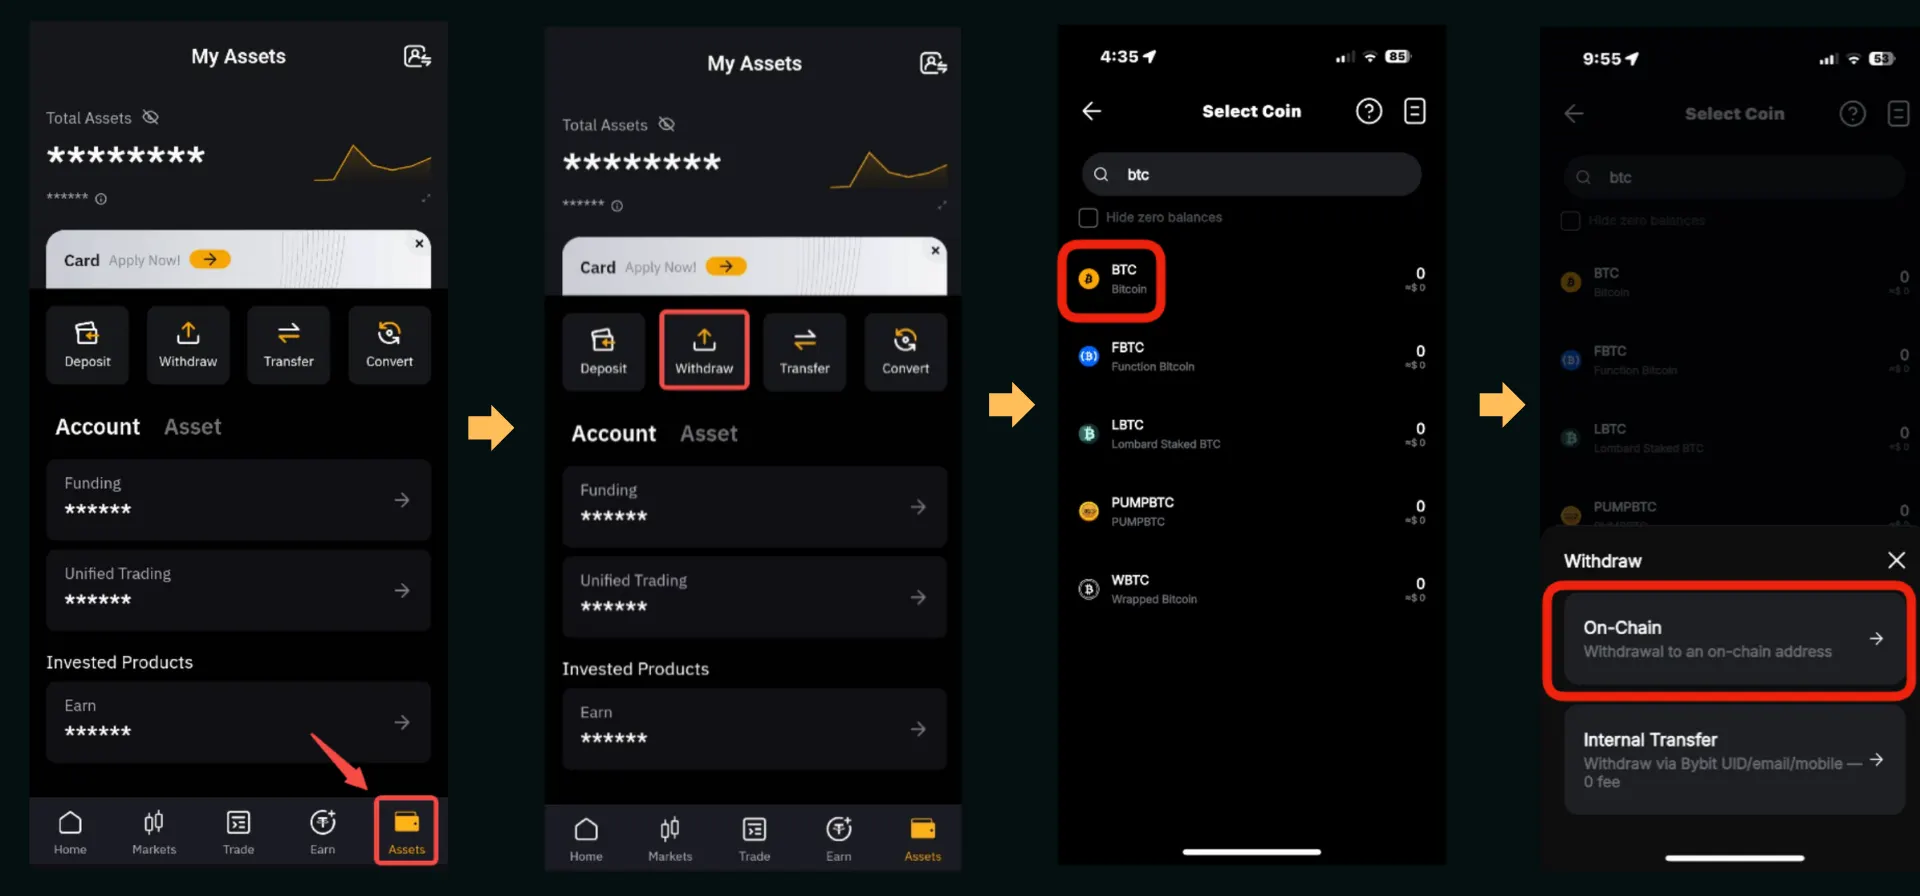
- Withdraw BTC from Bybit (or your chosen exchange).
Log in to your Bybit account and navigate to Assets → Withdraw → BTC → On-chain.
- Enter your withdrawal request by entering the information below
- Enter your withdrawal Muun wallet’s on-chain BTC address. Scan the QR code or Copy and paste the Lightning address shown in Muun app.
- Select the correct chain type in the drop-down menu for your withdrawal request, in this case: Bitcoin BTC.
- Enter the withdrawal amount. You will see below the field the current amount that you can withdraw and, at the bottom of the page, the withdrawal fee amount and the final amount that you will receive. Make sure your available funds covers the invoice total plus fees.
- Note: On the app, all withdrawal requests should be submitted from the Funding Account. If your assets are in another account, please transfer them to the Funding Account wallet by clicking on the + icon above the amount field, then tapping on Transfer to proceed.
- Click on the Withdraw button at the bottom of the page.
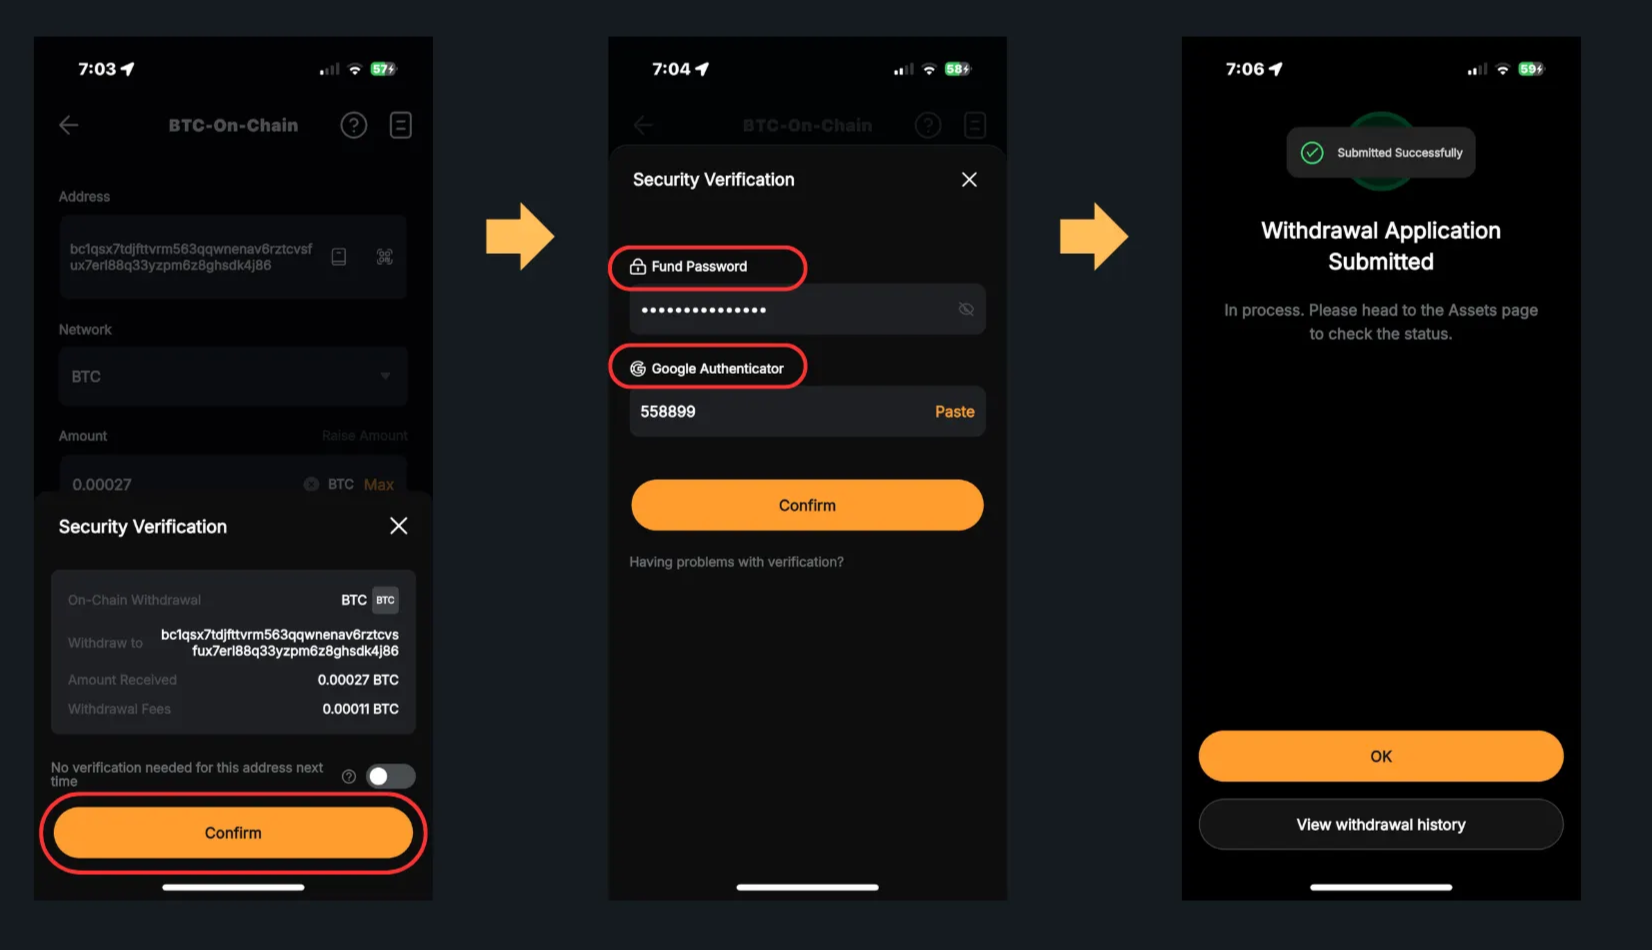
- Review the Withdrawal Fees shown in the next screen. Tap Confirm and complete the Security Verification:
- Enter your Fund Password.
- Enter your Google Authenticator code.
💡Please note that you can withdraw for almost no fee from Kraken, OKX, Kucoin or Binance using the Lightning network.
- Once verified, tap Confirm again. A confirmation message will appear: “Withdrawal Application Submitted”
Your transaction will be processed within a few minutes. You can track the progress in Assets → History → Withdrawals.
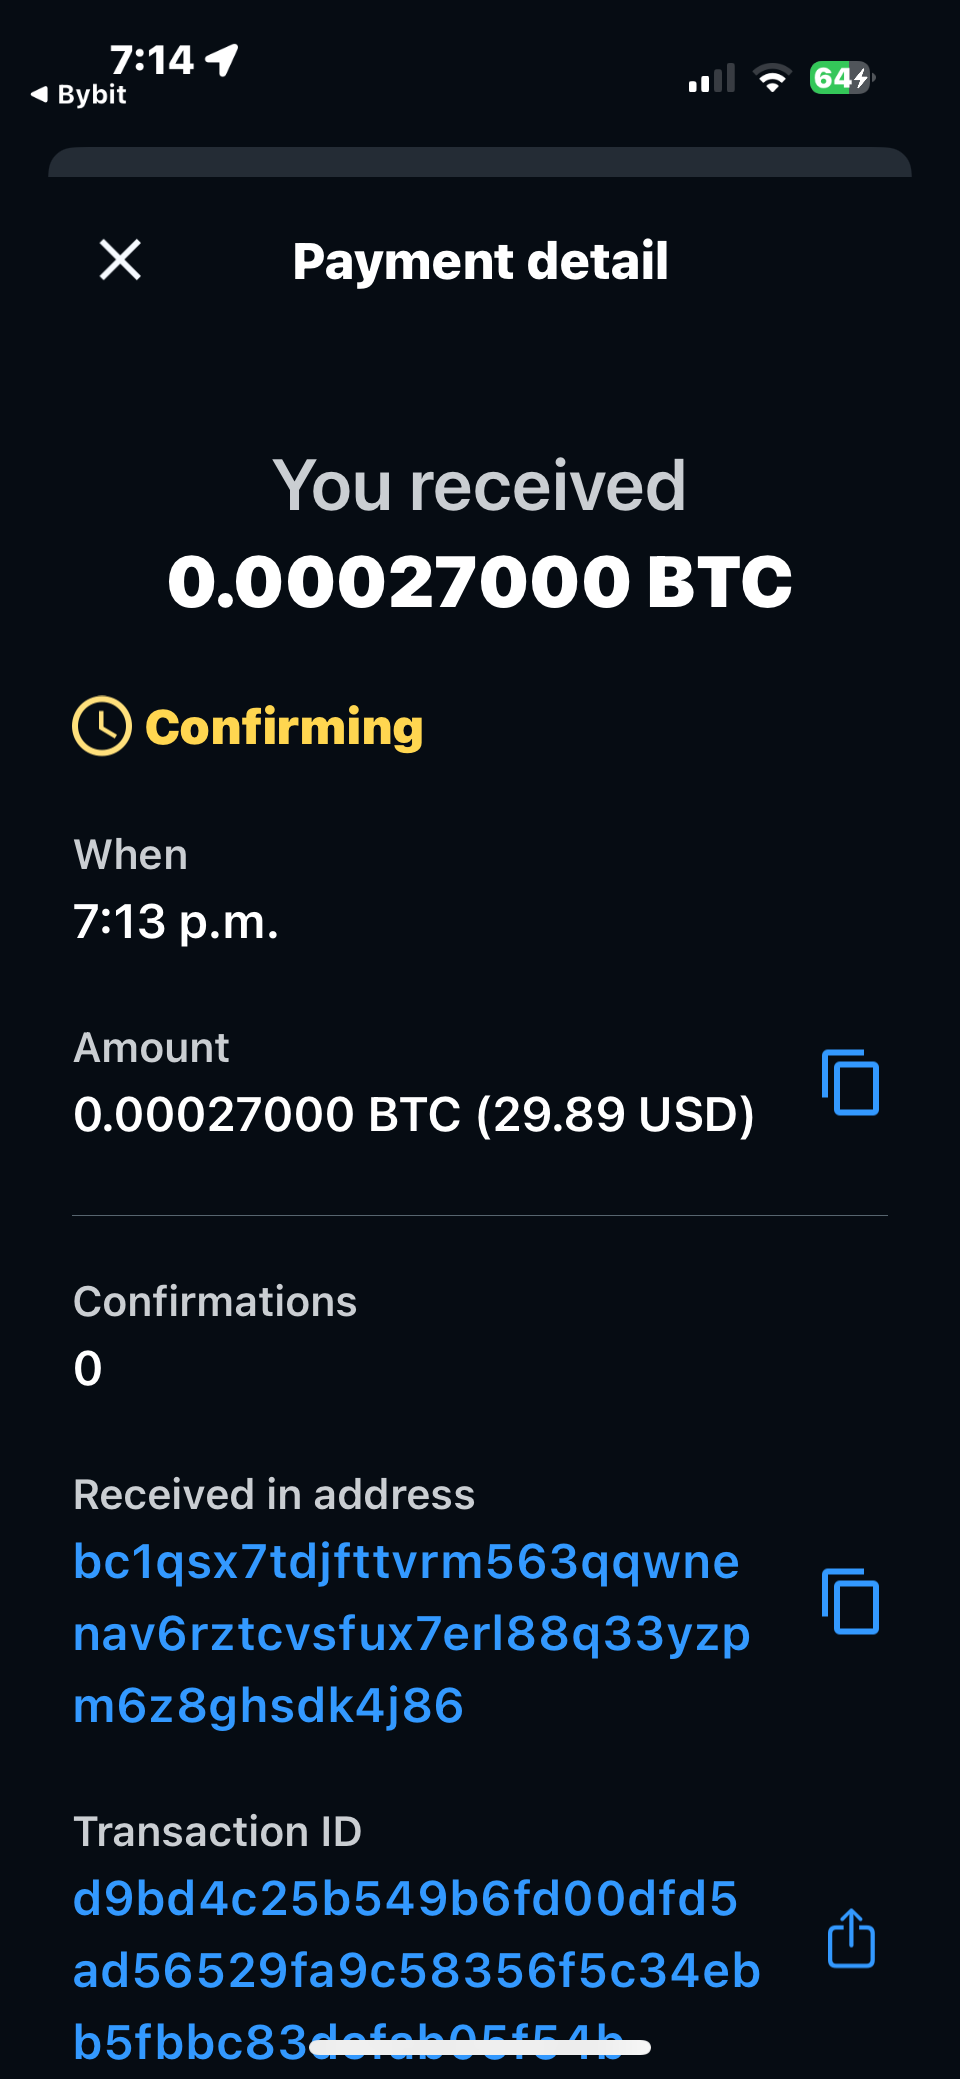
- Wait for Deposit Confirmation: Your wallet will notify once the on-chain deposit is confirmed. It may take a few minutes.
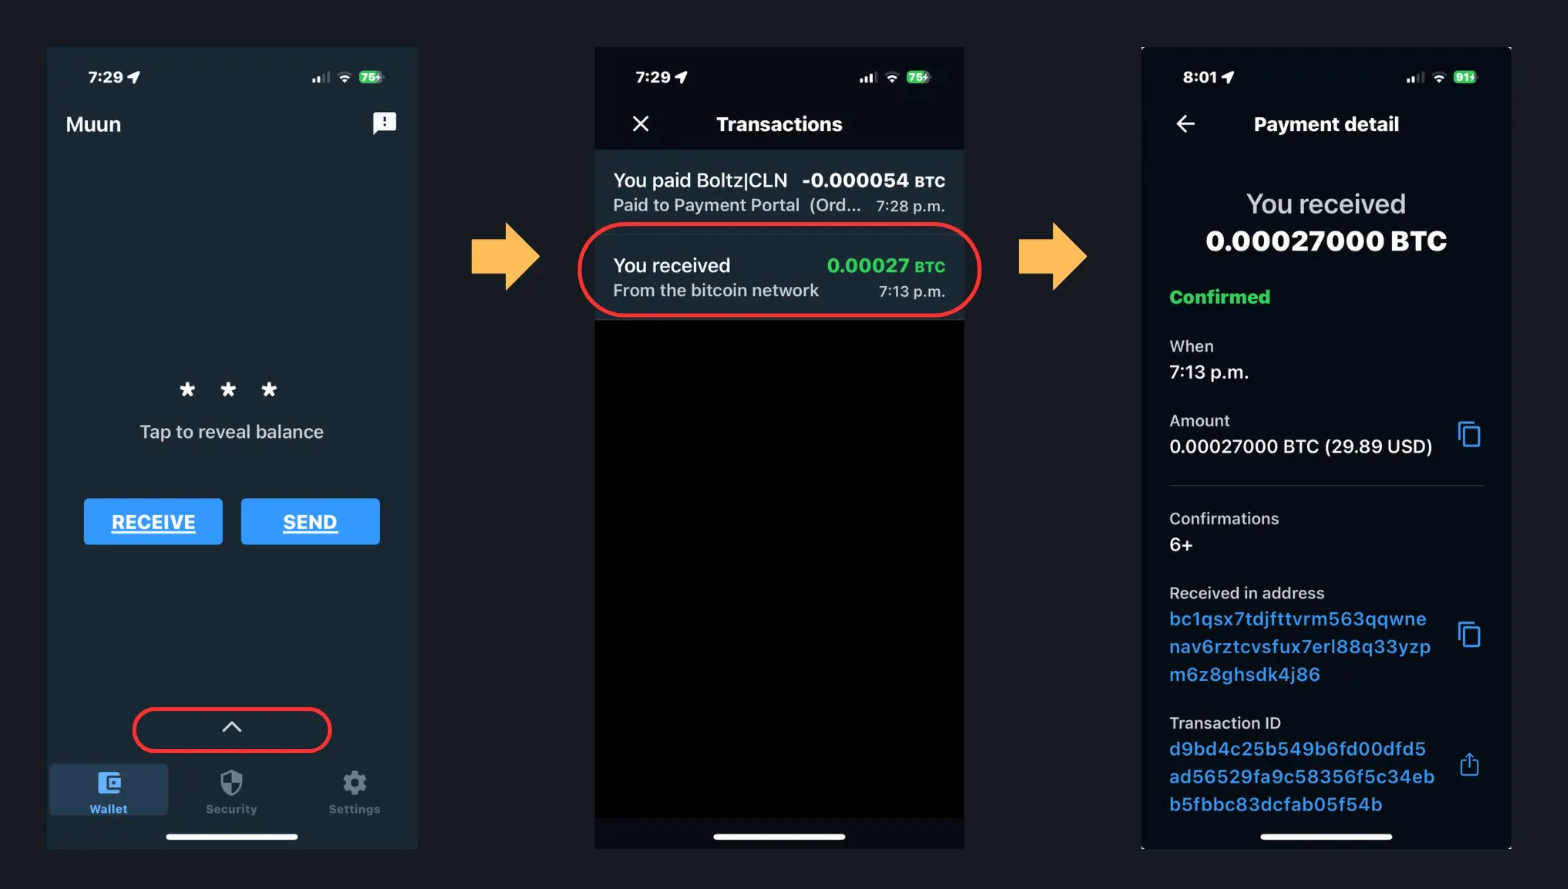
- Verify Your Funds. Go to your Muun home screen, tap the arrow at the bottom, then select the transaction you want to review. The next screen will show your new funds, including amount, timestamp, and confirmation details.
💡 FAQs
Why does Bybit show an error when I scan the QR code?
When scanning the QR code, Bybit’s app sometimes parses the payment data incorrectly and adds extra parameters to the address (for example: bitcoin:, or an amount at the end of the string).
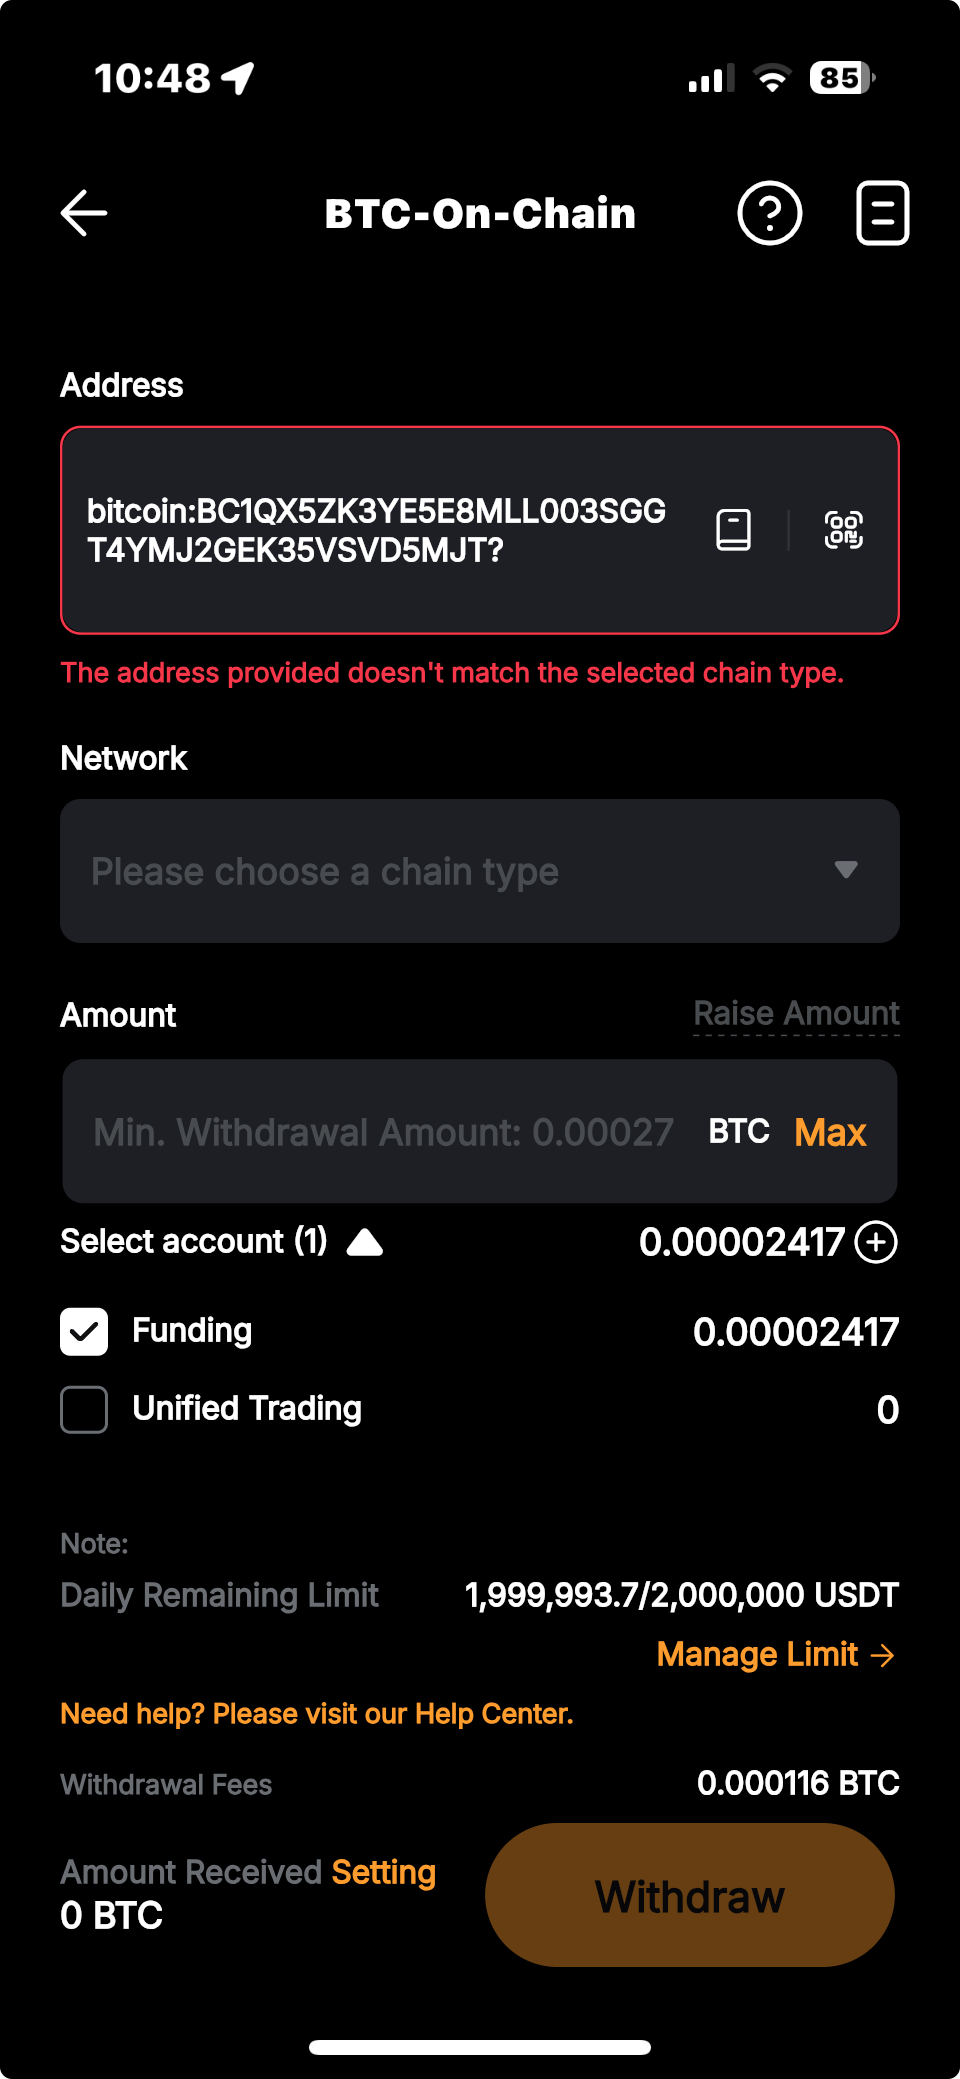
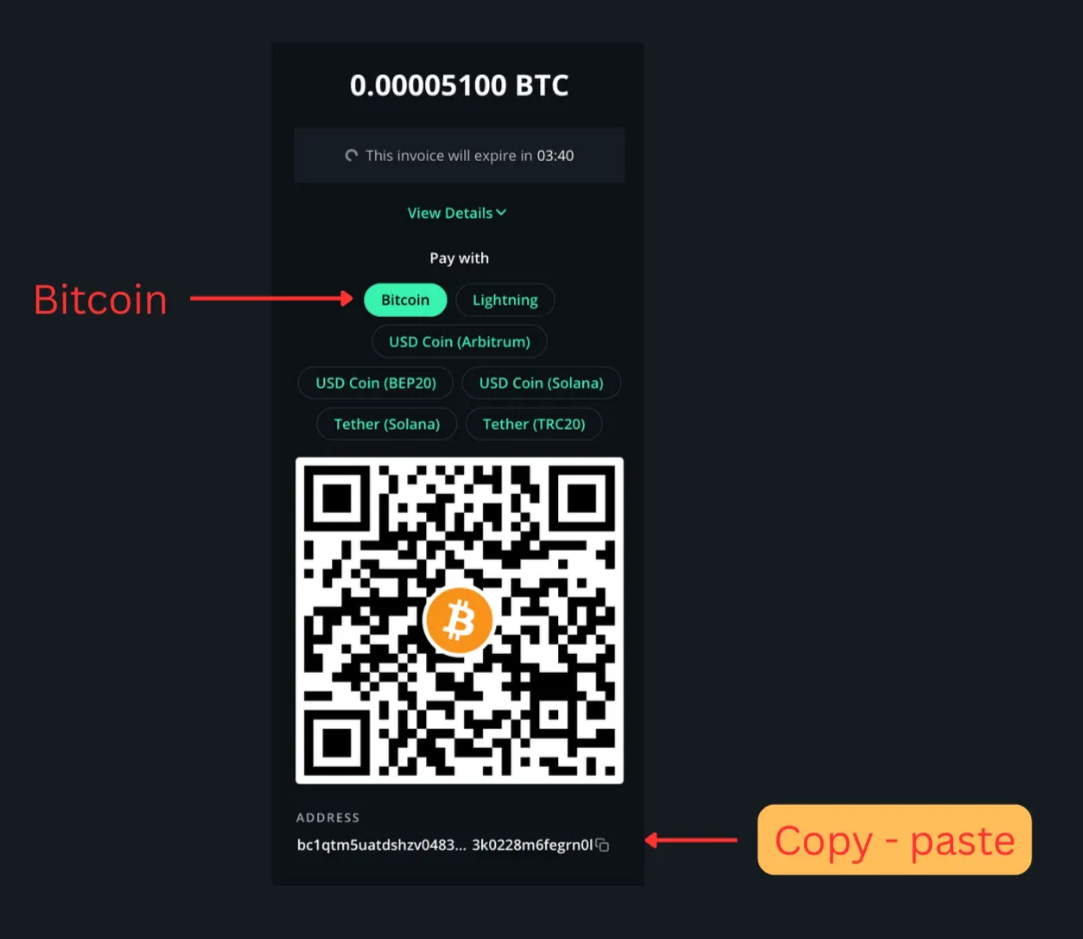
This causes the app to reject the address and display an error like “The address provided doesn’t match the selected chain type.”
Solution:
Please copy and paste the BTC address and amount due manually from your Sequence Payment Portal instead of scanning the QR code.
This is a Bybit UI issue — Sequence cannot correct it from our side.
What should I do if Bybit shows the error “Address check fail”?
Generate a new invoice to get the correct payment address:
- Click “Generate Invoice.”
- Wait 5 seconds.
- Then refresh the URL in your browser.
A new invoice with the correct address will appear under the “View Invoice” tab.
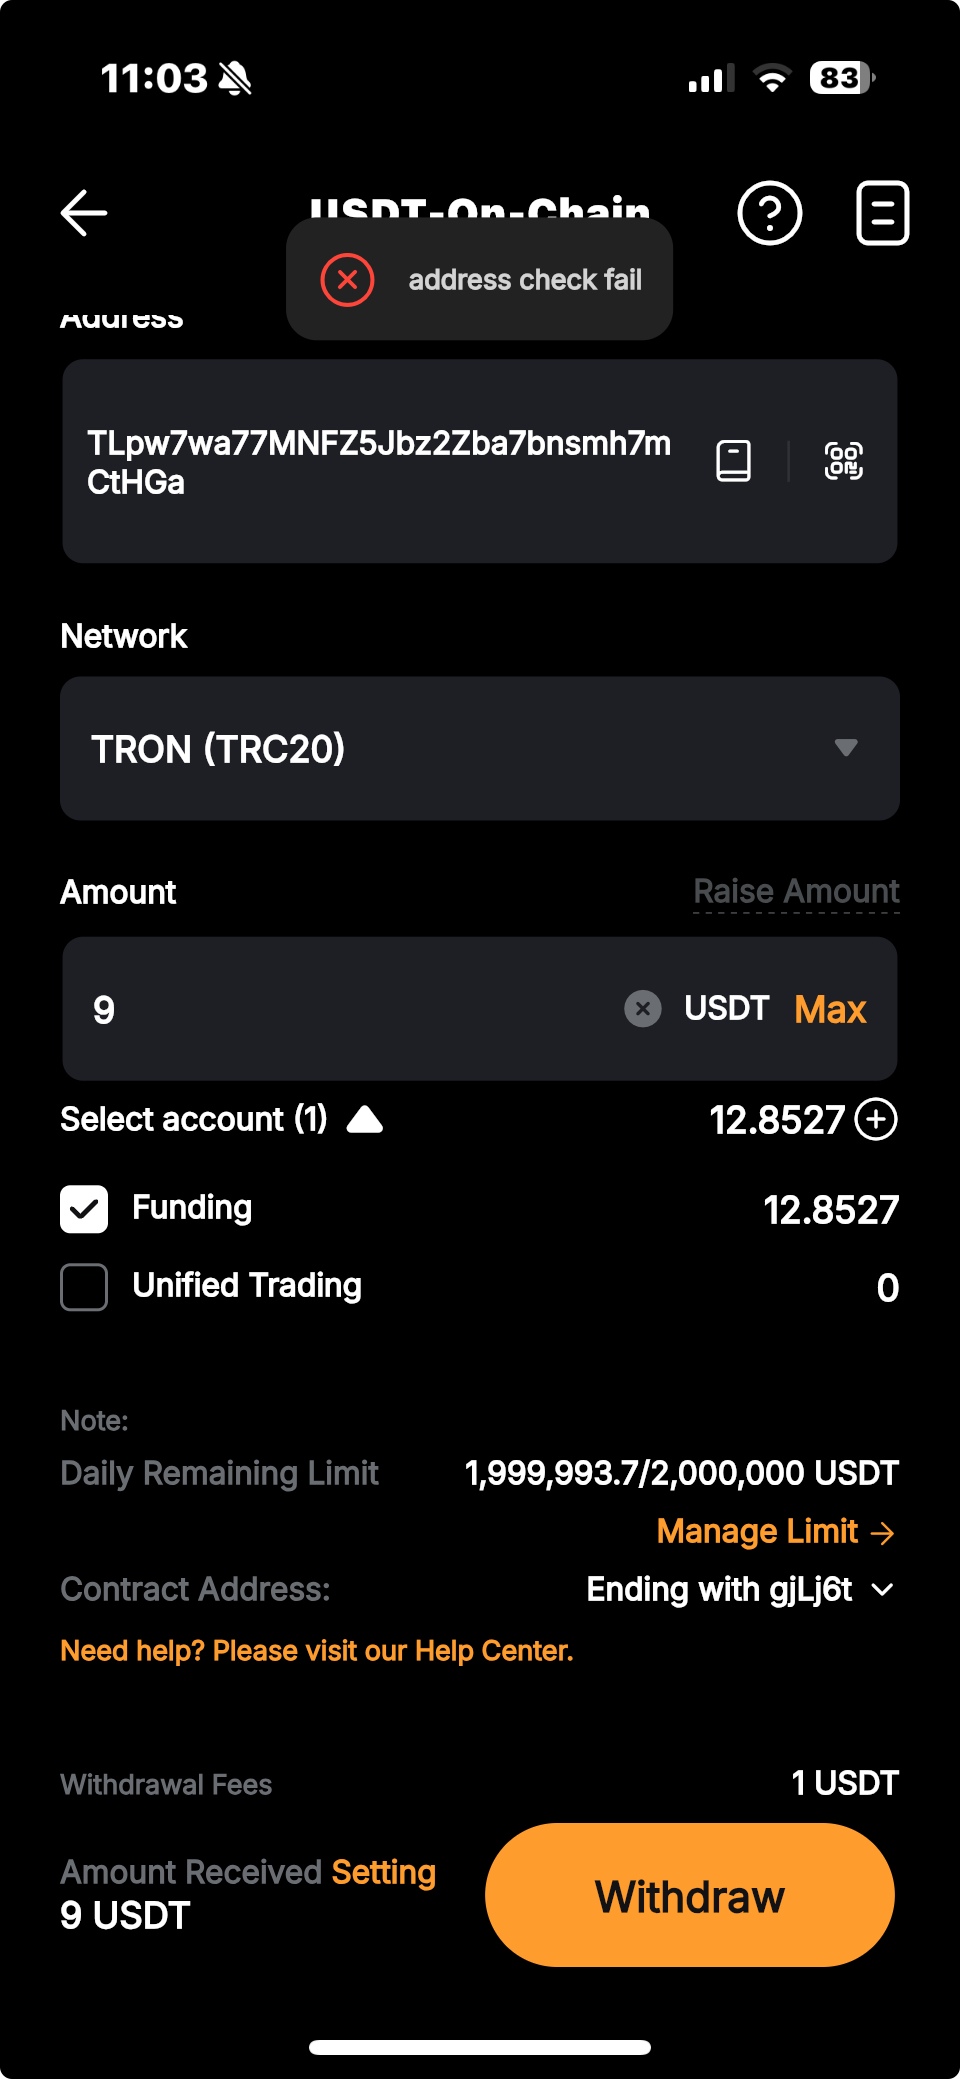
What should I do if my invoice is below 0.00027 BTC and Bybit won’t let me send the amount?
Bybit has a minimum BTC withdrawal limit of approximately 0.00027 BTC.
If your Sequence invoice is smaller than that amount, your payment may be rejected.
Option: Pay with USDT or USDC — Follow this guide:
What is the Lightning Network?
The Lightning Network (LN) is a second-layer protocol built on top of Bitcoin that allows for faster and cheaper transactions by processing payments off-chain before settling them on the main blockchain. It’s designed for instant, low-fee transfers ideal for everyday use.
Why Pay via Lightning Network?
Lightning payments are fast, secure, and low cost, perfect for BTC invoicing.
This method supports clients who are both comfortable with exchanges and those preferring self-custody wallets.
Why is it called a Lightning Invoice?
It’s called a Lightning invoice because it’s part of the Bitcoin Lightning Network, a layer built on top of Bitcoin that allows instant, low-fee transactions. The invoice contains all the payment details—amount, destination, and expiration—so funds can be sent and confirmed almost “at lightning speed.”
🧩 Other Useful Resources (External Links)
- Bybit’s Official Guide: How to Submit an On-Chain Withdrawal Request
- Muun’s Official Website: https://muun.com
- Muun’s Official Help Center: https://help.muun.com
- Muun’s Official Open Source Repo: https://github.com/muun/apollo
- Kraken: How do I send bitcoin on the Lightning Network?
- OKX: How do I withdraw Bitcoin (BTC) with OKX’s lightning network?
- Kucoin: Depositing and Withdrawing BTC using the Bitcoin Lightning Network on KuCoin
- Binance: How to Use the Bitcoin Lightning Network to Deposit and Withdraw BTC on Binance